This article explains how to disable your computer’s proxy settings.
Disabling proxy settings can protect your privacy and improve network performance in some cases.
Below are directions to disable proxy settings in Google Chrome, Firefox, and Safari.
Disabling Proxy Settings in Google Chrome
Open Google Chrome.
At the top right of the browser toolbar, click More.

Select Settings.

Select System.

In the System section, click Open proxy settings.

This will open the Internet Properties window. Under Local Area Network (LAN) settings, click on LAN settings.

Under Automatic configuration, uncheck Automatically detect settings. Also make sure Use a proxy server for your LAN is unchecked.

Click OK.

Click OK.

Disabling Proxy Settings in Firefox
Open Firefox.
Click the Menu button.

Select Settings.

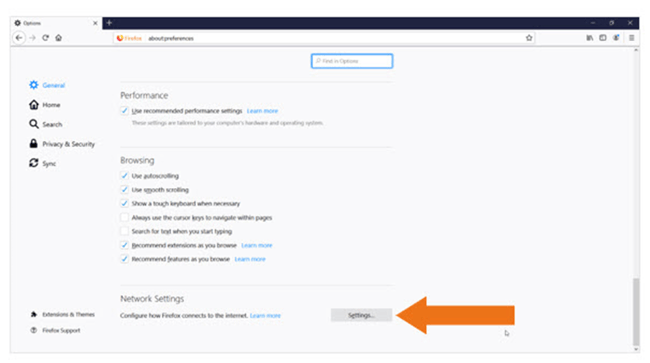
In the General section, scroll down until you see Network Settings and then click the Settings button.
Select either No proxy or Auto-detect proxy settings for this network.

Click OK.

Disabling Proxy Settings in Safari
Open Safari.
Click the Safari menu and click Preferences.

Select the Advanced tab, and click on Change Settings (next to Proxies).

This will open the Proxies section of Network Preferences. Nothing should be checked in here; if it is, remove the check mark and click OK.

Click OK and close any open boxes to save your settings.