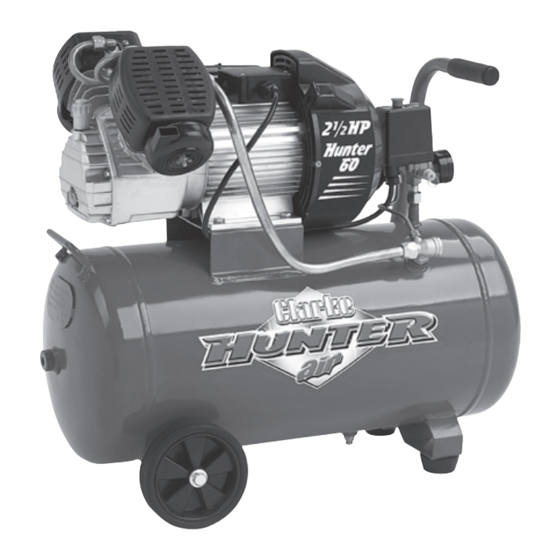
Summary of Contents for Clarke HUNTER
-
Page 1: Air Compressor
HUNTER HUNTER AIR COMPRESSOR AIR COMPRESSOR OPERATION & MAINTENANCE INSTRUCTIONS © 0407... -
Page 2: Specifications
Part No................2130020 Please note that the details and specifications contained herein, are correct at the time of going to print. However, CLARKE International reserve the right to change specifications at any time without prior notice. Always consult the machine’s data plate ©... -
Page 3: Table Of Contents
Thank you for purchasing this CLARKE HUNTER Air Compressor, which is designed for hobby and DIY use only. Please read this leaflet thoroughly and carefully follow all instructions. In doing so you will ensure the safety of yourself and that of others around you, and you can look forward to the compressor giving you long and satisfactory service. -
Page 4: Safety Precautions
DO NOT operate your compressor with any guards removed. Electrical or mechanical repairs should only be carried out by a qualified engineer. If problems occur, contact your Clarke dealer. Before carrying out any maintenance, ensure the pressure is expelled from the air receiver, and the machine is disconnected from the mains. -
Page 5: Assembly
Remove the breather - see opposite, and use a funnel to fill the machine with oil (supplied). Check to ensure the oil level is midway across the sight glass, as shown opposite. Compressor oil is also available from your Clarke dealer. -
Page 6: Electrical Connections
ELECTRICAL CONNECTIONS Connect the mains lead to a standard, 230 Volt (50Hz) electrical supply through an approved 13 amp BS 1363 plug, or a suitably fused isolator switch. WARNING! THIS APPLIANCE MUST BE EARTHED IMPORTANT: The wires in the mains lead are coloured in accordance with the following code: Green &... -
Page 7: Operation
OPERATION Before connecting your Hunter to the mains supply, check the following:- • The mains voltage is 230V. • The ON/OFF control knob (A) is in the OFF (lower) position. • The pressure regulator (C) should be set at its lowest setting, i.e. turned fully anticlockwise. - Page 8 5 - 10 minutes, depending upon ambient temperature, press the reset button and attempt to restart. If the motor fails to start, after several attempts, consult your Clarke dealer. Once the machine has started and run for a few minutes, close the drain valve, the pressure will build up in the receiver to a regulated max.
-
Page 9: Routine Maintenance
Fig.3 Check the oil level, which should be midway across the sight glass, as shown in Fig.3. Remove the breather and top up, using a funnel, with Clarke compressor oil (SAE40). Drain and replace the oil after 6 months. Fig. 4... -
Page 10: Troubleshooting
Compressor should start again not start. when pressure reduces to approx. 95 psi. CAUTION Do not attempt any repair or adjustment if you are uncertain as to how it should be done. If you have any queries, contact your local CLARKE Dealer. -
Page 11: Parts List
PARTS LIST No. Description Qty Part No. No. Description Qty Part No. Hex Skt Hd Bolt M6X55 8 HTHUN001 Bolt M6x45 HTHUN051 Spring Washer 6 HTHUN002 Pipe(u) HTHUN052 Air Filter HTHUN003 Pipe(u) HTHUN053 Cylinder Head HTHUN004 Capacitor HTHUN054 Elbow HTHUN005 Screw M3X5 HTHUN055 Cylinder Gasket... -
Page 12: Parts Diagram
PARTS IDENTIFICATION... -
Page 13: Accessories
ACCESSORIES Your Clarke Hunter Oil Free Air Compressor can be used in conjunction with a range of optional accessories for inflating tyres, air brushing, stapling, blowing and many other uses. For details contact your local accessory stockist. A complete kit is available from your Clarke dealer which is ideal for almost all applications. -
Page 14: Paint Spraying Hints
PAINT SPRAYING HINTS WARNING NEVER attempt to spray unless you are wearing suitable, approved respiratory and eye protection. REMEMBER that some modern paints require specialist respiratory protection...always consult the paint manufacturers instructions. 1. GENERAL PREPARATION a. Ensure that the area in which you will be spraying is clean and dust free. b. -
Page 15: Handling The Gun
For a professional looking finish paint must be thinned. If the manufacturers recommendations on thinning are not available, the following can be used as a general guide: Water based paints (emulsions) - 10-20% water Oil based paints (gloss) - up to 10% white spirit thinners Cellulose paints - up to 50% cellulose thinners 3.


