380s-4, 340s-4, Series 3 - Braun Consumer Service spare parts use ...
380s-4, 340s-4, Series 3 - Braun Consumer Service spare parts use ...
380s-4, 340s-4, Series 3 - Braun Consumer Service spare parts use ...
You also want an ePaper? Increase the reach of your titles
YUMPU automatically turns print PDFs into web optimized ePapers that Google loves.
www.braun.com<br />
<strong>Series</strong> 3<br />
<strong>Series</strong> 3<br />
+<br />
–<br />
<strong>380s</strong>-4<br />
<strong>380s</strong>-4<br />
<strong>340s</strong>-4
2<br />
1<br />
2<br />
3<br />
4<br />
5<br />
6<br />
7<br />
8<br />
9<br />
<strong>Series</strong> 3<br />
<strong>Series</strong> 3<br />
+<br />
–<br />
<strong>380s</strong>-4<br />
STOP<br />
+<br />
380 340<br />
–<br />
10<br />
11<br />
12<br />
<strong>380s</strong>-4<br />
–<br />
+<br />
<strong>Series</strong> 3<br />
<strong>Series</strong> 3<br />
380<br />
340
3<br />
+<br />
90°<br />
full<br />
lock<br />
full<br />
oil<br />
click!
7<br />
+<br />
–
English<br />
Our products are designed to meet the highest standards of quality,<br />
functionality and design. We hope you enjoy your new <strong>Braun</strong> Shaver.<br />
Warning<br />
Please read the <strong>use</strong> instruction carefully and thoroughly before using the<br />
appliance.<br />
Your shaving system is provided with a special cord set, which has an<br />
integrated Safety Extra Low Voltage power supply. Do not exchange or<br />
tamper with any part of it, otherwise there is risk of an electric shock.<br />
Do not shave with a damaged foil or cord.<br />
This appliance is not intended for <strong>use</strong> by children or persons with reduced<br />
physical or mental capabilities, unless they are given supervision by a person<br />
responsible for their safety. In general, we recommend that you keep the<br />
appliance out of reach of children. Children should be supervised to ensure<br />
that they do not play with the appliance.<br />
For hygienic reasons, do not share this appliance with other persons.<br />
For usage in other body areas, please make sure that the skin is stretched.<br />
Oil bottle<br />
Keep out of reach of children. Do not swallow. Do not apply to eyes.<br />
Dispose of properly when empty.<br />
Description<br />
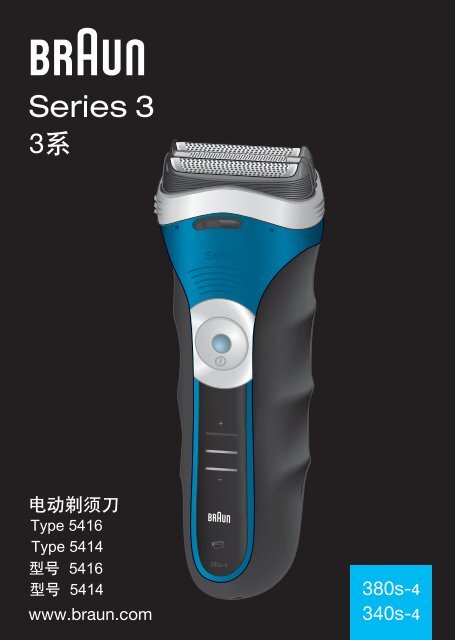
1 Foil & Cutter cassette<br />
2 Long hair trimmer<br />
3 Precision setting switch (« ») (<strong>380s</strong> only)<br />
4 On/off switch<br />
5 Charging lights (green)<br />
6 Low-charge light (red)<br />
7 Replacement light for shaving <strong>parts</strong><br />
8 Shaver power socket<br />
9 Special cord set<br />
10 Charging stand<br />
11 Etui (<strong>380s</strong> only)<br />
12 Protection cap (<strong>340s</strong> only)<br />
Charging<br />
The best environmental temperature for charging is between 15 °C to 35 °C.<br />
Do not expose the shaver to temperatures higher than 50 °C for extended<br />
periods of time.<br />
14
• Using the special cord set (9), connect the shaver or the charging stand (10)<br />
to an electrical outlet with the motor switched off.<br />
• When charging for the first time or when the shaver is not <strong>use</strong>d for a few<br />
months, leave the shaver to charge continuously for 4 hours.<br />
• Once the shaver is completely charged, discharge the shaver through<br />
normal <strong>use</strong>. Then recharge to full capacity. Subsequent charges will take<br />
about 1 hour.<br />
• A full charge provides up to 45 minutes of cordless shaving time depending<br />
on your beard growth. However, the maximum battery capacity will<br />
only be reached after several charging/discharging cycles.<br />
• 5-minute quick charge is sufficient for a shave.<br />
Charging lights (5)<br />
The green charging lights show the charge status of the batteries (<strong>340s</strong>:<br />
1 charging light). The green charging light blinks when the shaver is being<br />
charged or switched on.<br />
When the battery is fully charged, all green charging lights (<strong>340s</strong>: 1 charging<br />
light) shine permanently, provided the shaver is connected to an electrical<br />
outlet.<br />
Low-charge light (6)<br />
The red low-charge light flashes when the battery is running low. You should<br />
be able to finish your shave.<br />
Shaving<br />
Press the on/off switch (4) to operate the shaver (picture).<br />
The flexible shaving foils automatically adjust to every contour of your face<br />
(picture).<br />
Long hair trimmer (2)<br />
To trim sideburns, moustache or beard, slide the long hair trimmer upwards.<br />
Precision setting switch (« ») (<strong>380s</strong> only)<br />
For precise handling in hard to shave areas (e.g. under the nose) slide the<br />
switch (3) to the right to position « ». The centre trimmer and one foil will be<br />
lowered.<br />
Tips for the perfect shave<br />
For best results, <strong>Braun</strong> recommends you follow 3 simple steps:<br />
1. Always shave before washing your face.<br />
2. At all times, hold the shaver at right angles (90°) to your skin.<br />
3. Stretch your skin and shave against the direction of your beard growth.<br />
15
Cleaning<br />
16<br />
This appliance is suitable for <strong>use</strong> in a bath or shower. When using<br />
it in the shower, we recommend applying shaving foam or gel.<br />
For safety reasons this appliance can only be operated cordlessly.<br />
Regular cleaning ensures better shaving performance. Rinsing the shaver<br />
head under running water after each shave is an easy and fast way to keep<br />
it clean:<br />
• Switch the shaver on (cordless) and rinse the shaver head under hot<br />
running water. You may <strong>use</strong> liquid soap without abrasive substances.<br />
Rinse off all foam and let the shaver run for a few more seconds.<br />
• Next, switch off the shaver, remove the shaver Foil & Cutter cassette (1)<br />
and let it dry.<br />
• If you regularly clean the shaver under water, then once a week apply a<br />
drop of light machine oil onto the long hair trimmer (2) and shaver<br />
Foil & Cutter cassette (1) (picture).<br />
Alternatively, you may clean the shaver using a brush:<br />
• Switch off the shaver. Remove the shaver Foil & Cutter cassette and tap it<br />
out on a flat surface (picture).<br />
• Using a brush, clean the inner area of the shaver head. However, do not<br />
clean the shaver Foil & Cutter cassette with a brush as this may damage it<br />
(picture).<br />
Keeping your shaver in top shape<br />
Replacement light for shaving <strong>parts</strong> / Reset<br />
To maintain 100% shaving performance, replace the shaver Foil & Cutter<br />
cassette (1), when the replacement light for shaving <strong>parts</strong> (7) comes on (after<br />
about 18 months) or when worn.<br />
Foil & Cutter cassette: 32S/32B<br />
The replacement light will remind you during the next 7 shaves to replace the<br />
Foil & Cutter cassette. Then the shaver will automatically reset the display.<br />
After you have replaced the Foil & Cutter cassette (1), press the on/off switch<br />
(4) for at least 5 seconds to reset the counter.<br />
While doing so, the replacement light blinks and goes off when the reset is<br />
complete. The manual reset can be done at any time.
Preserving the batteries<br />
In order to maintain the optimum capacity of the rechargeable batteries, the<br />
shaver has to be fully discharged (by shaving) every 6 months approximately.<br />
Then recharge the shaver to full capacity.<br />
Environmental notice<br />
This product contains rechargeable batteries. In the interest of<br />
protecting the environment, please do not dispose of the product in<br />
the ho<strong>use</strong>hold waste at the end of its <strong>use</strong>ful life. Disposal can take<br />
place at a <strong>Braun</strong> <strong>Service</strong> Centre or at appropriate collection sites<br />
provided in your country.<br />
Subject to change without notice.<br />
For electric specifications, see printing on the special cord set.<br />
17
<strong>Braun</strong> GmbH<br />
Frankfurter Straße 145<br />
61476 Kronberg/Germany<br />
www.braun.com<br />
www.service.braun.com<br />
98826515/III-11<br />
China/Korea/GB


